
When Teresia Mutua reached out to us about her residential fumigation in Athi River, she had one main request, she wanted her home to be completely free from pests and protected for the long term. She had been noticing unwanted activity for a few weeks, and the situation was slowly becoming a problem she could not ignore. Cockroaches were making their way into her kitchen cupboards, ants had found their way into the pantry, and she had also seen early signs of termite activity on some of her wooden furniture.
Teresia’s home is her safe space, and pests not only disrupted her comfort but also posed health risks to her family. This was the perfect case for our residential fumigation service, which is designed to clear all pests and prevent their return while keeping the home safe for its occupants.
Step 1: Understanding the Problem
The first step in any residential fumigation job is to fully understand what we’re dealing with. Our team arrived early in the morning to carry out a thorough inspection. We began with a walkthrough of the entire home, paying attention to both visible pest activity and hidden signs such as droppings, chew marks, and entry points. We also spent time in the outdoor areas because many pests, especially ants and termites, start from outside before moving indoors.
We listened to Teresia’s concerns and asked her when she first noticed the problem. She explained that the cockroaches became more frequent at night in the kitchen, ants were moving along the kitchen counters during the day, and a few termite wings were found near a wooden cabinet. This information was important because it helped us create a targeted approach to residential fumigation rather than just a general spray.
Step 2: Preparing the Home
Once we had the inspection results, we prepared a customized plan for Teresia’s home. For residential fumigation, safety comes first, especially in homes where people live daily. We selected fumigation chemicals that are strong against pests but safe for humans and pets when applied by professionals.
We advised Teresia and her family to temporarily leave the house during the process. All food items were stored securely, kitchen utensils were covered, and we ensured that pets were moved to a safe location. Furniture was shifted slightly away from the walls so we could reach hidden areas where pests often hide.
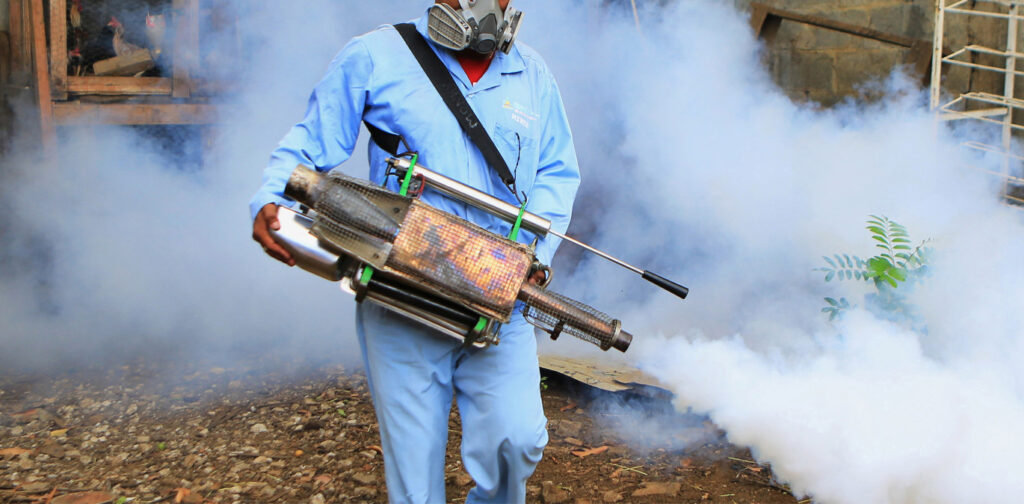
Step 3: The Fumigation Process
The fumigation began with the kitchen — the heart of the home and the place with the most pest activity. In residential fumigation, the kitchen often requires the most detailed work. We treated under sinks, behind appliances, inside cupboards, and along wall edges where cockroaches and ants travel.
Next, we moved to the bedrooms. Even though they weren’t as heavily affected, it’s important in residential fumigation to ensure that pests such as bedbugs, fleas, or hidden termites are addressed before they become visible problems. Wooden furniture, bed frames, and skirting boards were carefully treated with safe solutions.
The bathrooms and store areas were treated for moisture-loving pests such as silverfish and to prevent cockroach nesting.
Outside the house, we carried out a perimeter spray — a critical step in residential fumigation because it creates a protective barrier to keep pests from re-entering. We treated ant colonies in the garden, termite mounds near the fence, and potential nesting areas for crawling insects.
Step 4: Post-Treatment Safety and Ventilation
After the fumigation process, the home was sealed for the recommended time to allow the treatment to work to its full effect. In residential fumigation, timing is important because some pests are hidden deep in cracks or furniture, and they need time to come into contact with the treatment.
When the waiting period was over, our team returned to open windows and doors to allow fresh air in. We carefully checked all rooms to ensure the home was completely safe before the family returned.
Step 5: Results and Client Satisfaction
The results were immediate. Teresia reported that she no longer saw cockroaches in the kitchen, the ant trails had disappeared, and there were no new signs of termite activity. The home felt fresher, safer, and more comfortable.
She expressed relief and satisfaction, saying the residential fumigation had not only removed the pests but also given her peace of mind. For her, the most important part was knowing that her wooden furniture and home structure were now protected from future damage.
Step 6: Preventive Advice
A successful residential fumigation does more than just remove pests — it also helps homeowners understand how to keep them away. We provided Teresia with practical tips for long-term pest control:
- Store all dry foods in airtight containers.
- Keep the kitchen clean and free from food crumbs or spills.
- Seal small cracks and gaps in walls, floors, and around doors and windows.
- Remove standing water to prevent mosquito breeding.
- Arrange regular pest inspections, especially after rainy seasons.
Why This Project Stands Out
This project in Athi River is a great example of why residential fumigation works best when it’s customized. Many people think fumigation is just spraying everywhere, but real success comes from inspecting, planning, using the right products, and following up with preventive advice.
Our team didn’t just focus on one type of pest; we tackled multiple problems at once — cockroaches, ants, and termites — while also protecting against future infestations. This is the standard we bring to all our residential fumigation projects.
Before and After
Before:
- Visible cockroach activity in the kitchen at night.
- Ant trails leading to the pantry.
- Early signs of termites in wooden furniture.
After:
- Pest-free kitchen and pantry.
- No signs of ant colonies or movement.
- Termite threat eliminated before serious damage occurred.